Wednesday, 1 July 2026

How to Create Your Own Water Feature: A Simple DIY Garden Project


DIY homemade garden water feature made from decorative pots with flowing water, surrounded by plants and flowers in a peaceful outdoor garden

Welcome back,

In today's post, I am sharing with you how to create a water feature for your garden, balcony, or any other outdoor space. 

Below is a photograph of the water feature in our garden. 

My daughter Alicia made it as she is the gardener in our house since my health decided I wouldn't be able to do it anymore. She has always loved gardening, and as a little girl, she helped me. She had her own little tools and gardening gloves, and she loved to go outside every morning to check the progress of "her garden" This is something she still does now as an adult. 


DIY homemade garden water feature made from decorative pots with flowing water, surrounded by plants and flowers in a peaceful outdoor garden

I love that Alicia enjoys gardening. I loved it too. Sadly, since becoming unwell and disabled, I am no longer able to do the gardening, but I enjoy seeing what Alicia has done with it. I go to the garden centre with her to choose new things, and then she loves to show me where she's planted them and how they're doing. It's something we both love. 

Alicia is also growing vegetables this year and really enjoying that too. 

What You'll Need: 

1 Large Planter. 
1 Bowl Style Planter.
1 Solar Water Fountain.
1 Bag Of Compost.
Bedding plants of your choice. 
A hosepipe or watering can. 

We Bought These:

Large Planter - Click me to buy
Bowl Style Planter - Click me to buy
Solar Fountain - Click me to buy
Compost - Click me to buy
Bedding Plants - Click me to buy

Because the large planter is very large, a tip is to either place some cardboard or broken pots, any will do, if you have any chipped mugs you don't want, you can smash them and pop those in, or cut up a pool noodle into 2/3 inch pieces and pop them in the bottom of the planter. This just saves on how much compost you will need to use and is good for drainage. We had a big box from the planters, so Alicia ripped those up and put them in.

How To Make Your Water Feature:

Before starting, put your large planter where you want it in your garden, ensuring it's in a sunny spot. 

1: Drill or use scissors to make quite a few holes in the bottom of the large planter. 

2: Use cardboard, cut up pool noodles, broken pots or plant pots and put them in the bottom of the large planter. 

3: Put the compost into the large planter, leaving a big enough gap to put your bowl planter in. 

4: Once the planter is filling up to where you want the compost, take the bowl planter and put it in the middle of the large planter and add compost around the sides. DO NOT DRILL HOLES IN THE BOWL STYLE PLANTER. 

5: Once you have the amount of compost you want surrounding your bowl planter, plant your bedding plants around the bowl planter in the space around it. 

6: Add water to your bowl planter and water your bedding plants. 

7: Open your solar fountain, read the instructions and pop it in the water. 

8: You may need to swap out the different spray options on your fountain until you find the one you like best. 

9: All done, you now have a water feature. 

10: Alicia added some solar lights in our water feature, it looks lovely at night. 

DIY homemade garden water feature made from decorative pots with flowing water, surrounded by plants and flowers in a peaceful outdoor garden

DIY homemade garden water feature made from decorative pots with flowing water, surrounded by plants and flowers in a peaceful outdoor garden

Our Water Feature At Night:

DIY homemade garden water feature made from decorative pots with flowing water, surrounded by plants and flowers in a peaceful outdoor garden

Total Cost Of Our Water Feature:

Large Planter - £25.00 
Bowl Style Planter - £15.99 
1 Solar Water Fountain - £8.99
1 Bag Of Compost - £8.00 
Bedding plants of your choice - £14.99 

Total = £72.97 

The same costs we had were the two planters and the solar fountain. Our bedding plants were bought at a local garden centre and cost around £10.00, and our compost also came from our local garden centre and was around £6.00. So it was slightly cheaper, but the items I have listed aren't badly priced, as I searched for the best prices.

So, that's how to create a water feature like ours, which is easy to create and looks really pretty. I especially love our water feature at nighttime when it's lit up. Alicia has done such an amazing job, our garden looks so lovely, and she's worked really hard on it, especially since she currently has a broken foot in two places! 

To buy all the items listed, you can find the direct links by clicking HERE.

Do you think you'll create your own water feature? Or do you already have one? I'd love to see if you do have one. 

Thank you for reading, 

Zoë x

Links included in this post are affiliate links, and if you buy something through my links. I may make a small amount of commission. 
SHARE:

Thursday, 28 September 2023

Small Business Spotlight - From Friendship To Flames: Smoke + Matches


handmade soy candles, hand poured soy candles, concrete trays, concrete candles, mikhila mcdaid candles,
image taken from smoke + matches website

Welcome back

In a world filled with mass-produced products, there's something special that comes with buying handcrafted items. Imagine relaxing at home with the soft flicker of candlelight and the smell of a stunning fragrance filling the room, while supporting a small business. That's precisely what my friend, Khila, and her friend Karen have brought to life by launching their new business, Smoke + Matches.

When Smoke + Matches launched, I purchased 3 of the products and will be sharing my honest opinions of those products in this post, but first I want to tell you all about Smoke + Matches because simply put, I'm really proud of my friend Khila.

About Smoke + Matches & The creators

My lovely friend Khila met Karen when they both worked together in the railway industry and after a while, they realised they had a lot in common. This is what they said about how Smoke + Matches came to be:

"It's hard to pinpoint exactly where this idea took root but both being somewhat creative 'seekers', it was only a matter of time until we did something together... It was just a matter of what. The idea of a candle business was discussed in mid 2022 but knowing the time and dedication it required, we decided to work to Autumn 2023 as a launch date. In hindsight, this presented itself at a time when we were each looking to escape some mental health struggles and throw ourselves into an all-consuming pastime. For the past 6 months, we have lived and breathed wax and fragrance. The volume of messages exchanged would lead you to believe we were engaging in a sordid affair. From deciding on the colour of our tissue paper at 3 a.m. to those first test sales, it has already been such a journey and we can only hope that you enjoy what we have laboured over enough that we get to keep doing it."

Smoke + Matches - The Products

There are some beautiful products available from the Smoke + Matches website and because the products are so reasonably priced for such amazing quality, you'll be 100% spoilt for choice. On each item page, there are details of allergens, ingredients and any warnings with a description of each item, I have never seen such detailed listings on a website, it's something many others could take note of and follow suit.

The Products:

Travel Candle: These are 50g and their burn time is around 15 hours, although I would say mine burned for longer. Travel Tins are available in several different scents, and some new ones coming soon so lots to choose from, they are tins with a screw lid which is easy to open and are a great way of trying scents if you're undecided. 

You can find the Travel Candles HERE priced at £6.00 each. 


Wax Melt Snap Bar: These are 50g and their burn time depends on how much of the bar you use at each time. These are available in several different scents, they are such a great price for a handmade soy product and with recyclable and biodegradable packaging too, so, run don't walk to pick some up. 

You can find the Wax Melt Bars HERE priced at £4.50 per bar.

THE WAX MELT SNAP BARS ARE ON A 3 FOR 2 OFFER UNTIL SUNDAY.


Glass Jar Candle: These are 160g in a 20cl glass jar and the burn time is 40 hours, they are made from coconut soy wax with a 100% cotton wick and come in several scents. I really like the look of these, they have such a classic look and would look great in any home.

You can find the Glass Jar Candles HERE priced at £11.00.


Concrete Candle: These are 220g and the burn time is 40 hours, they are made from coconut soy wax with a 100% cotton wick and are available in different scents which all sound insanely nice. The concrete jars are handmade which blows my mind, they look incredible! Because each candle is handmade, they may vary slightly in the way they look and in texture, but it does not affect the burn time. The candles come with either cork or rubber feet on the base, this is to protect your surfaces and increase stability.

You can find the Concrete Candle HERE priced at £16.00


Concrete Match Pot: These are lovely and such a great idea, plus they are also handmade, there are 4 different variations to choose from, but like the concrete candles, because they are handmade, they may differ in colour and texture. The pots cannot be shipped with matches included and come with a striker strip and either rubber or cork feet, these are for stability and to protect your surfaces. I love these, I haven't seen anything like these before and think they are such a great idea, the fact they are handmade makes them even more special.

You can find the Concrete Match Pot HERE priced at £9.00.


Concrete Tray: These are stunning, each tray is handcrafted and because of this, completely unique, there are 8 different designs to choose from ( 3 are coming soon). Each tray is waxed with a 100% natural sealant to create a water-resistant finish, which is ideal for use in the kitchen or bathroom. They come with either rubber or cork feet for stability and protection of your surfaces.

You can find the Concrete Trays HERE priced at £10.00.


Minimalist Wax Burner: This wax burner is lovely, it has a metal stand with a removable ceramic dish that makes it easy to clean and looks simple but classy.

You can find the Wax Burner HERE priced at £12.00


My Purchases:

I really wanted to support Khila and Karen with their new business by purchasing some things from their website, unfortunately, due to a horrific accident my partner Simon had some years ago resulting in him being set on fire in a gas explosion at work, we don't have candles at home. As well as the physical injuries Simon suffered, he was badly psychologically affected by the accident too, and even years later, he is just about okay with having a birthday cake with candles in the house, but actual candles burning, freaks him out. 

I totally get it and wouldn't want him to feel uncomfortable, so after having a chat with him, I decided to go for 3 of the Travel Tins. The plan was, that I'd burn them whilst he was at work and he was fine with that. 
small business, new small business, smoke and matches, candles, soy candles, cotton wax


small business, candles, soy candles, cotton wick, hand poured candles

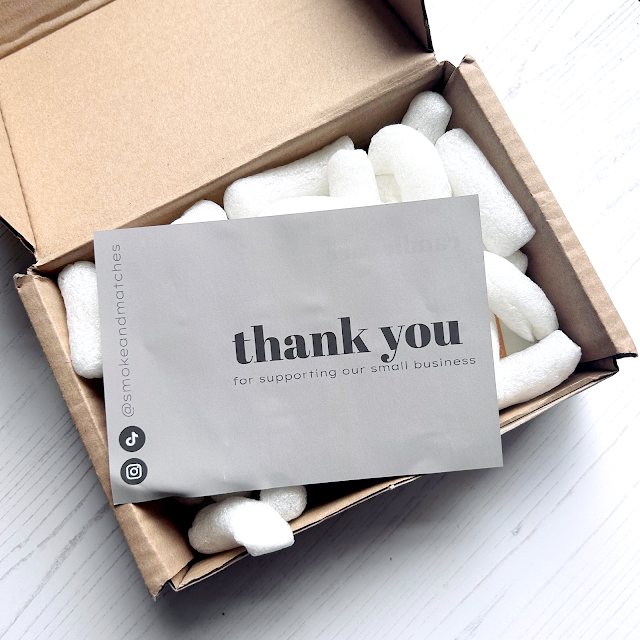
The parcel arrived well packaged with the Smoke + Matches logo on the front of the box and inside the Travel Tins were carefully and securely packaged using packing nuggets. There was a thank you card with details of social media accounts and instruction/care details on the reverse, I thought this was a nice touch and also really helpful. 


The 3 Travel Tins I bought were Coffee Shop, Beach House and Good Morning. I love the packaging of the tins, and the labelling too, they look classy and sleek. The lids unscrewed easily, which can sometimes be an issue with my silly hands,  but I was fine. 

When we burned the first candle, we popped the tin on a coaster on our sideboard. Almost as soon as my daughter lit the candle, we could smell it, and I was sat across the other side of the room. We burned Beach House first, followed by Good Morning and lastly, Coffee Shop. The burn time is advised at 15 hours per tin, but I found mine burned longer, and they all smelled lovely, I thought I would have a clear favourite scent but I didn't, they were all really nice. The tins are brilliant if you're unsure of which scent to choose, or if you don't burn candles regularly enough to get a bigger one. 
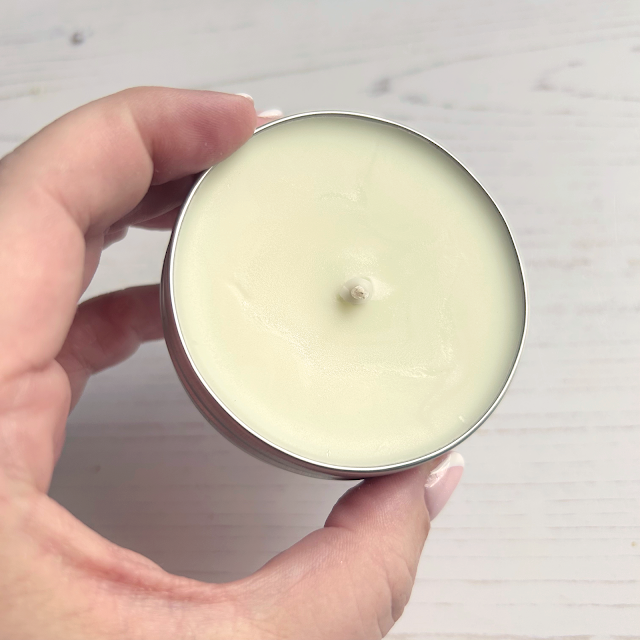

The photograph above shows how big the tins are, they are a brilliant size and were perfect for us. I am so proud of Khila, the amount of items on the website is incredible, these are hand poured and the concrete items hand made. The amount of work and dedication that goes into this business is unreal, and it shows in the quality of the products, how many products are on the website and how professional the website looks. 

I loved all 3 of the tins I purchased, they were ideal for us and all smelled beautiful. I love the concrete trays too, the colours and metallics in them are so pretty, they look incredible and would make lovely gifts, and not just for candle lovers, I think they'd make a nice jewellery tray too. 

Overall I was really happy with my purchases and love the whole website too, it is easy to navigate and has lots of information on each item, and everything is a great price, especially for handmade items. The products would make lovely gifts and since the C word is upon us, definitely check them out. Plus the wax melt bars are on a 3 for 2 deal until Sunday so a perfect time to buy, to treat yourself or to do some early Christmas gift shopping, or any gift shopping.

If you would like to check out Smoke + Matches, and I highly recommend you do, you can find their website HERE

Good Luck to Khila and Karen as they continue with Smoke + Matches, it's an amazing business with stunning products and I wish you both love and luck as you smash the business world, one wax melt at a time. 


Thank you for reading

Zoë x

SHARE:

Wednesday, 20 July 2022

How To - Homemade Dog Ice Cream - An Easy Recipe

How To - Homemade Dog Ice Cream - An Easy Recipe


The weather in the UK the past few days has been what I can only describe as insane, it has been horrendously hot and finding ways to keep cool has been a top priority for most of us I would imagine. It has been unbearably hot for us humans so our furry friends must have felt awful, I know our fur baby, Bear hasn't known what to do with himself bless him, it's been awful to see. 

Every summer our youngest daughter,  Alicia makes Bear homemade dog ice cream, it's perfectly safe for all dogs (unless your dog has certain allergies) and is so quick and simple to make, so I thought I'd share with you how Alicia makes the homemade dog ice cream so you can make it for your dogs too if you like.  

Today I'm going to share with you how to make a fruit flavoured dog ice cream, but you can use any ingredients your dog likes. Bear loves fruit so he adores the fruit flavoured dog ice cream,  but one of his other favourite flavours is peanut butter and banana. 

What You'll Need

How To - Homemade Dog Ice Cream - An Easy Recipe

1. Low fat natural yoghurt - 280g 

2. Any fruit your dog likes, Alicia used two of Bear's favourites, strawberries (10) and blueberries (15).

3. A blender, hand blender or vegetable masher.

4. Ice lolly moulds or ice cube trays.

How To - Homemade Dog Ice Cream - An Easy Recipe

How To - Homemade Dog Ice Cream - An Easy Recipe

How To - Homemade Dog Ice Cream - An Easy Recipe


Method

1. Wash and chop the 10 strawberries and 15 blueberries into small chunks, removing any stalks.

2. Measure out 280g of the low fat natural yoghurt.

3. Put the fruit and yoghurt into a blender, if you don't have a blender, pop the ingredients into a bowl. 

4. Blend all the ingredients together until the consistency is smooth. If you don't have a blender, you can use a hand blender or masher, the mixture might not be as smooth using a masher but it doesn't matter, your dog will still love it. 

5. Once blended, pour the mixture into the lolly moulds and/or ice cube trays, or whatever you have to hand to put it in, any container you can put in the freezer will be fine. 

The lolly moulds we use are from B&M we have some pineapple shaped ones too, they both have cute faces on when the ice cream is frozen which is cute. 

6. Pop into the freezer for a couple of hours or until frozen, once frozen, the mixture will keep in the freezer for up to 8 weeks. 

How To - Homemade Dog Ice Cream - An Easy Recipe

How To - Homemade Dog Ice Cream - An Easy Recipe

How To - Homemade Dog Ice Cream - An Easy Recipe

How To - Homemade Dog Ice Cream - An Easy Recipe

More Ideas

You could also spread the mixture onto a Licki mat or fill a Kong type of toy with it and freeze it, Bear loves his licki mat and Kong, especially when frozen, they keep him entertained, are good for mental stimulation and are a great stress reliever, especially if your dog is finding the hot weather stressful. 

Licki mats are reasonably priced and you can find lots of different ones on Amazon like This One which is priced at £6.87 or if you prefer a Kong, you can find those on Amazon too, I found This One which is a medium size for £10.09.

Alicia is going to try some other ice cream flavours with Bear maybe apple and banana, or strawberry and peanut butter, he loves peanut butter so I'm sure he'll like it.  If you do use peanut butter, please make sure it doesn't contain Xylitol, this is an artificial sweetener and is highly toxic to dogs and can be fatal if consumed. 

We give Bear a peanut butter from Morrisons, you can find it on the website HERE, but if you're searching for a doggy friendly peanut butter, always check the ingredients, the one we buy is 100% peanuts and nothing else. 

How To - Homemade Dog Ice Cream - An Easy Recipe

I hope your dog likes the ice cream as much as Bear does.

How cute are those moulds? I love the smiley faces they leave on the ice cream, they always make me smile and judging by that big smile on Bear's face, I think he likes them too! 


Do you have fur babies? How have they been coping in the heat? 

Will you make this simple homemade dog ice cream? If so, which flavour will you make? Let me know in the comments and if you do make some of the ice cream, please tag me in any photographs you share or you can email me some if you'd rather. 

Zoë x


Products featured on my blog are PR samples unless otherwise stated.
Links used are affiliate links.

SHARE:
Blogger Template Created by pipdig