Saturday 28 February 2015

NOTD - Nail of the day


Hello Lovelies, 

Today I have another NOTD post (nail of the day post). These are proving to be quite popular with you all so I thought I'd keep them coming. So without further ado, here's today's NOTD.


What I Used

Max Factor Gel Shine Lacquer In Patent Poppy

First of all as always I used my HG base coat the Orly bonder, available to buy here. I have featured bonder in so many blog posts I don't feel I need to photograph it every time I mention it, you know what it looks like now :) 

I then applied 2 coats of the Max Factor Gel Shine Lacquer nail polish in the shade Patent Poppy, available to buy here for £6.99, allowing each coat to dry fully in between. I finished off with a coat of my HG top coat, the Orly Glosser, available to buy here, again no photograph of the top coat  needed it's featured so much on here already.

I featured another shade in the Max Factor gel shine range on my blog a few weeks ago, (blog post here) that shade was Twinkling Pink, a gorgeous vibrant fuchsia pink colour, I loved the colour and the polish lasted ages without chipping, I said in that post that I wanted to try some more shades in the range before I gave my opinion on it.

Patent Poppy is the second shade I have tried in the range, I recently bought it along with Sheen Merlot, (watch the haul video I show it on here) I'm yet to try the sheen merlot colour as I recently broke one of my nails so far down it was a mess and it has meant I haven't been able to paint my nails, don't you hate it when that happens? First world problems and all that! 

Thoughts On 'Patent Poppy'

As with twinkling pink, I loved the application of patent poppy, it applied well and the drying time in between coats was good. The gel shine polishes do have a lovely finish to them and they really do look gel like even without a top coat. 

Patent Poppy without a top coat (2 coats applied)

As you can see from the above photograph the polish has a beautiful shine to it and is really glossy and does in my opinion look like a gel polish, please excuse my poor cuticles, I had used a cuticle trimmer for the 1st time and to say it was sharp is an understatement! 

Patent Poppy is a beautiful bright true red colour and looks amazing on both the fingers and toes, it's a classic shade and one I feel would look lovely all year round but theres no denying this would make a fantastic Christmas nail shade. 

I did still apply a top coat as I always do with any polish, force of habit I suppose, but I was really disappointed when the polish chipped after just 24 hours, hoping it was just a one off I asked Lissy what she thought of it too and she said "I like the colour but it chipped really quickly" so unfortunately it wasn't a one off and the polish chipped quickly on Lissy too. 

The chipping issue is something that disappointed me because I think £6.99 is a lot to pay for a nail polish and for that price I'd hoped to get a little longer wear time from it as I did with the twinkling pink but I do adore the colour and the finish of the polish so it certainly won't put me off wearing it again. 

Overall I would recommend this polish because the finish and shade are beautiful, and in my opinion they do look like gel nails, it would cost me around £30 for a red gel polish to be applied at a salon and although I'd get 2 weeks out of it but I could buy 4 of these for less than that and have 4 amazing high shine colours on my nails during a 2 week period. 

I just wish there were more colours in the range, at the moment there are only 9 shades to choose from and I have the 3 I like the best so for now I won't be trying anymore of the gel shine lacquers, but watch this space for my review of the Sheen Merlot.

Have you tried the Max Factor Gel Shine Lacquers? Which are your favourite colours?

Thank you for reading, much love as always, 

Zoe x


SHARE:

Thursday 26 February 2015

An Exciting New Launch - MAC Retro Matte Liquid Lipsticks


Hello Lovelies, 

Today I have an exciting post for you, as you know I love MAC make up and I love lipsticks and more importantly matte lipsticks and I love the MAC lip mixes (review post here) so when I found out about a new product launching from MAC, I had to share it with you. 

MAC are launching Retro Matte Liquid Lipsticks, there isn't an official release date yet or if there is I couldn't find it!! But it is said to be some time in the summer, don't shoot me if I'm wrong though. 


How amazing do these babies look? I absolutely adore  the lip mixes from MAC and cannot wait to get my hands on these, I am a little disappointed in the colour range to be honest but I'm hoping if they are a hit, more colours will be added to the range but if not there are at least 3 I am loving, 10 extra points if you can tell me in the comments which 3 :) 

So far there aren't any permanent names for them but there should be more information soon, they are said to be opaque, long lasting and easy to wear and I for one am super excited!! I am in love with the  Anastasia Beverly Hills Liquid Lipsticks and have been lusting over them for quite some time now, the only problem is they are sold in the US but not here, typical eh? They sell for $20 in the US which is around £13 here in the UK or so google tells me, but I think I might just hang on for these now, I would imagine the MAC liquid lipsticks will sell for at least £15, maybe more, who knows? But they are sooooo lovely, I will definitely be adding 1 or more to my collection, that is if I haven't caved in and ordered from the Anastasia Beverly Hills website by then, but a girl can have more than 1 liquid lipstick, right? 

The launch of the Retro Matte Liquid Lipsticks is said to be February 2016 but I will update this post as and when I find out any more information, it's been a while since a MAC launch has got me this excited. 

Will you be purchasing any of the Retro Matte Liquid Lipsticks? And which colour or colours are your favourites? 

Thank you for reading, much love as always, 

Zoe x


SHARE:

Tuesday 24 February 2015

Recipe - Simon's Chicken And Chorizo Pasta


Hello Lovelies, 

Today I have something a little bit different for you, it's my first ever recipe post. I have been asked a lot to give you the recipe for the chicken and chorizo pasta that Simon makes and I have mentioned quite a lot, and today I have that recipe for you. 

Ingredients List (serves 4)


1 large onion or 2 small onions (chopped)
3 peppers (cut into strips) 
1 tub/punnet of mushrooms (chopped)
1/2 cloves of garlic (chopped) or 1 tsp of lazy garlic (as show above)
1 chorizo sausage (sliced)
3 chicken breasts (diced) 
2 tbsp tomato puree
2/3 tbsp of tomato ketchup
1 tin chopped tomatoes
Pasta of your choice, we use twists (use as much as you like to eat)
Flora spray oil or any oil or spray oil of your choice
1 tsp paprika (not shown on photo)
1/2 tsp mixed herbs (not shown on photo) 
Salt & Pepper

Method

1. Take a large pan and heat up your oil/spray oil 

2. Add the onion, garlic, mixed herbs and paprika to the pan and leave to cook for approx 5 minutes stirring occasionally.

3. Add the chicken and stir to coat with the onion mix, leave to cook for 5 minutes, stirring occasionally.

4. Add the chorizo and stir, leave to cook for 5 minutes, stirring occasionally. 

5. Add the mushrooms and stir in well, leave for a couple of minutes, in the mean time, using a separate pan, fill with water and bring to the boil, this is for the pasta.

6. Add the peppers and give the mixture a good stir, leave for approx 1 minute.

7. Add the tomato puree and mix well, leave to cook for 10 minutes. Then add the pasta to the boiling water in the other pan. 

8. Add the chopped tomatoes, tomato ketchup and season with salt and pepper, mix well, turn the heat down to a medium heat and leave to cook for approx 15 minutes without the pan lid as this will create steam/water in the mixture and thin it down too much. Stir occasionally. 

9.  Drain the cooked pasta and add to the chicken/chorizo mixture and stir well. 

10. Serve onto plates, we add some grated cheese but you can leave this out if you wish. 

11. Serve with garlic bread and enjoy. 

The finished product - without the cheese

The dish will keep in an airtight container in the fridge for 2/3 days too, ideal for lunches, if we have some left over Simon usually takes it into work as they have a microwave to heat it up. 

I hope you enjoyed my first ever recipe blog post and it was easy enough to follow. Please let me know if you make the dish and if you enjoyed it too. If you'd like more recipe blog posts please let me know, Simon is a qualified chef and worked as a chef for over 10 years before going into teaching so he has lots of great recipes up his sleeve.

If you have any comments or questions please leave them below and I will reply asap. 

Thank you for reading, much love as always,

Zoe x


SHARE:

Friday 20 February 2015

Primark Beauty Nail Polish Twist Pot


Hello Lovelies,

I'm sure you're all aware by now that Primark launched their own beauty line, P.S Love in 2014. I haven't tried much in the way of their make up but loved the nail art pens (comparison to models own post here) I recently picked up some other products from the beauty line (you can watch my haul here) and one of the things I picked up was the Nail Polish Twist Pot.

As you'll already know, I love painting my nails and paint them at least once a week, Lissy also shares my love of nail polish and painting her nails and paints her nails at least 3 times a week, throw in Cole also painting her nails, and as you can imagine we use a lot of nail polish and nail polish remover in our house. 

My nail polish remover of choice is the acetone free nail polish remover from Superdrug available to buy here. It's £1.39 for 250ml, I have repurchased it several times and never use anything else because it is fabulous! 

I saw the twist pot in Primark and thought it looked interesting and I was curious to see if it did what it said on the tin so to speak so I thought I'd give it a go and also thought "I'm sure my subscribers and blog readers would love to know if this is a good product" so I bought it for myself to try and to review it for you all too. 

Anyway, I digress (as usual) I haven't tried a nail polish remover pot since Bourjois launched their Magic Nail Polish remover, (available to buy here) I didn't ever repurchase that though because I felt it was expensive for what it was, saying that, it did do what it said on the tin.

I was really excited to try the Primark twist pot, as I said I loved the nail art pens and have tried other products (reviews coming soon) which I have loved from their P.S Love range.

The front of the pot

The back of the pot including usage instructions

The sponge inside the pot

As you can see from the above photographs, the pot comes with instructions of how to use on the back and claims to be "fast & effective with no mess and no fuss" but was it? 

Using the twist pot and my thoughts

The first time I used the twist pot, I removed a red nail polish, it took quite a bit of rubbing and I had to make sure I held my nail against the sponge so it rubbed on the nail, my fingers were left stained red and quite wet and I had to use a cotton pad and nail polish remover to clean off the red staining. I thought that the staining was because I had a red polish on because to be fair red polish is a bit like that even with a cotton pad and nail polish remover so the next time I tried it I had a pink polish on, it did still smear and leave staining on my fingers but it wasn't as bad as with the red. I have also used the pot to remove a pink polish with a glitter top coat, that wasn't brilliant at all and the pink polish was removed leaving the glitter behind, meaning I had to then remove the glitter with a cotton pad and nail polish remover. 

Overall thoughts

I wasn't too impressed with the twist pot and won't be repurchasing it, it wasn't great at removing polish, like I said earlier, I had to rub my nail against the sponge to remove the polish, and I was left with staining and it was even worse at removing glitter top coat. 

It's only £1.00 so it didn't break the bank, but I would much rather spend another 39p plus £1.00 on some cotton pads and remove my polish that way, and I'm sure it would last longer too. I will use the pot until it runs out or dries up whichever comes first but I certainly won't be buying it again. 

I was really disappointed because I wanted to love this product but it just wasn't great at all, I think if they'd perhaps used a better polish remover inside the pot it would have been a winner for me. 

In this case the product most definitely does not do what it says on the tin I'm afraid,  it wasn't fast or effective and was messy and fussy.

Unfortunately as Primark don't have an on line shop and the product isn't sold on line anywhere I cannot provide a link for the twist pot but it is available to buy at some Primark stores. 

Thank you for reading, much love as always, 

Zoe x


SHARE:

Tuesday 17 February 2015

Charlotte Tilbury Colour Chameleon Eyeshadow Pencils


Hello Lovelies, 

When Charlotte Tilbury's make up line first launched in September 2013 I have to admit I really wasn't too interested in it, I'd heard of Charlotte and knew she was a make up artist but didn't really have much of an opinion on the launch of her make up and skin care line, I thought it would just be another high end launch with lots of hype. 

Fast forward to Christmas 2014 and I am completely in love!!! I started to dip my toe in the Charlotte Tilbury waters so to speak around October/November of 2014 after speaking to my lovely friend Gemma about the brand, she had been to an event and had the opportunity to try some of the products and was lucky enough to meet Charlotte herself, Gemma told me she loved the products and how amazing she thought they were so I started to a little research of my own. I began looking on line at the products and reading reviews and watching videos of Charlotte using her products and I was completely smitten, I asked my daughter Nichole who is a make up artist, what she thought of the brand and she said she'd not used the products on clients but she said she would take a look at the products and let me know what she thought. Nichole had remained tight lipped about her opinion of the products because little did I know she had loved them and bought me some of the products for Christmas, but she didn't want me to go out and buy any of them so she kept her love of them quiet from me.

I was thrilled to receive the make up at Christmas and 2 of the products I was lucky enough to receive were 2 of the Colour Chameleon eyeshadow pencils in Champagne Diamonds a pale champagne/gold colour and Dark Pearl a rich brown colour. 

The packaging of the pencils

L- Dark Pearl & R- Champagne Diamonds

L-Dark Pearl & R-Champagne Diamonds

Swatches of the pencils

To say I love these pencils would be an understatement, they are amazing products and I will certainly be re purchasing these when they run out (after I've had a little cry and mourned them for a while) I've never used an eyeshadow pencil before and I had read on some blogs that some people found these hard to use, and all I can say to that is.......why? 

They are soooo easy to use, I use mine by first of all applying champagne diamonds all over my eyelid and up to my crease, straight from the pencil, then I take a MAC 217 brush and blend out the edges. Then I take the dark pearl and draw a 'v' shape in the outer corner of my eye and along my crease, and again taking my 217 brush I blend it out. I then apply some of the dark pearl along my lower lash line and blend it out again with the 217 brush. The pencils blend beautifully, they are so easy to work with, I would say you have to be quite quick with them as they do set and once they do they don't move but you have enough time to work with them and achieve the look you want to. 

my make up using the eye shadow pencils

The make up look shown above is a typical look I create using the pencils, it is so quick and easy and these pencils would be ideal for someone who doesn't have a lot of time to get ready, they are super quick and super easy to use, I like that they can be built up too, if I wanted a more smoky look I would just apply more of the dark pearl and blend it until I'd got the look I wanted. 

Champagne Diamonds is a beautiful champagne/gold colour with a little bit of sparkle to it, it's not overly sparkly and suitable for both day and night looks, Dark Pearl is a lovely rich brown colour, again with a hint of shimmer/sparkle but nothing too OTT as you can see from the photograph above, the pencils can be used for both daytime and evening looks and I can't wait to use Dark Pearl on its own all over the lid and smoked up to the crease, I'll add a little of the Champagne Diamonds in the tear duct area to open my eyes a little.

I really like the pencils, they are stunning, the apply well and blend beautifully but there are a couple of negatives, one is that these do crease on me, I do have oily eye lids and need to use a primer so if you have oily eye lids you will need a primer, the MAC paint pot in painterly is a great primer for cream eyeshadows so I would recommend using that or something similar under the pencils, but if you don't have oily lids they may not crease on you but it is something I wanted to mention and a negative for me. My next negative is that the pencils need sharpening after each use meaning they wear down very quickly so they will need to be re purchased a lot if you use them all the time. These aren't huge negatives and I do love the pencils but I am always honest and feel these are things you need to know. It doesn't change my opinion of the pencils, they are stunning, but I feel you need to know the negatives I have found with them too. 

If you'd like to try the Colour Chameleon Eyeshadow Pencils you can find them on line on the Charlotte Tilbury website or by visiting the Selfridges website or on the Net-A-Porter website. Or in store at Selfridges in Birmingham, London and Manchester (exchange square) Harvey Nichols in Leeds, Fenwick in London and Brown Thomas in Dublin. 

Have you tried any of the Charlotte Tilbury make up? What's your favourite product or your most lusted after product? 

Thank you for reading, much love as always, 

Zoe x


SHARE:

Wednesday 11 February 2015

Nail Of The Day - NOTD


Hello Lovelies, 

I'm back today with another NOTD post or nail of the day to give it it's "Sunday name" as my mum would say. And today's notd is a lovely plum colour and I've added a bit of sparkle to it, you know me and my sparkle, I do love a bit of sparkle don't I? I promise the next notd won't feature any sparkle, cross my heart. 

So I'll stop waffling on and show you today's NOTD 


What I Used

Sally Hansen Complete Manicure Polish In Plums The Word

Essie Pure Pearlfection

I did also use my favourite base and top coat but stupidly forgot to take photographs, the orly bonder base coat is available to buy for £10.90 here and my favourite orly glosser top coat is available to buy for £10.90 here. I always use the orly base and top coat, they are my holy grail base and top coat and have been for many years now. 

First of all I applied a coat of the orly bonder base coat, and then I applied 2 coats of the Sally Hansen  Complete Manicure in Plums The Word, a lovely muted plum colour, perfect for winter. The Sally Hansen polishes are a complete manicure because they are 5 products in 1, they are a base coat, a strengthener, a growth treatment, a colour and a top coat. I do still use my own base and top coat out of habit but the polish is a 5 in 1 product so you don't necessarily have to which is great, they are priced at £6.99 which isn't too bad for a 5 in 1 product but it is rather a lot for me to pay for a nail polish, usually around £5.00 is my limit unless it's a polish I really fall in love with,  but even then I don't usually go over £10.00. 

Two coats of plums the word

Once the Sally Hansen polish was completely dry I applied a coat of the Essie Pure Pearlfection polish, a lovely subtle sparkly polish, you might be able to see that mine has a slight pink tone to it, it shouldn't actually look like that (oops) it is white in colour normally. I love this polish it looks lovely over a colour polish but my favourite way to use it is to put it over the white when I create a french manicure, it gives the tips of my nails a lovely sparkly finish and looks lovely. Essie polishes are expensive but they do last, I bought this one a couple of years ago and theres still a few applications left. I finish the look with a coat of my favourite orly glosser top coat. 

The above photograph shows the Sally Hansen polish after 2 coats and without any top coat, as you can see it is a lovely polish and very glossy too, so if you don't want to add the sparkle over the top it looks lovely both with and without. 

I really loved the look of the polishes together and received a lot of compliments on my nails, they lasted really well too and the polish stayed chip free for 6 days and I only removed it because I caught my nail and took and chunk out of it other wise I think they would have lasted a couple more days at least, I was really impressed with the Sally Hansen polish and will definitely try some more from the collection. 

If you'd like to create this NOTD you can find the Sally Hansen polish here for £6.99 and the Essie polish here for £7.99. 

Have you tried any of the Sally Hansen polishes? Do you like to add sparkle to your nails or do you prefer them without? 

Thank you for reading, much love as always, 

Zoe x


SHARE:

Tuesday 10 February 2015

Something A Little Bit Different - 1 Page At A Time


Hello Lovelies, 

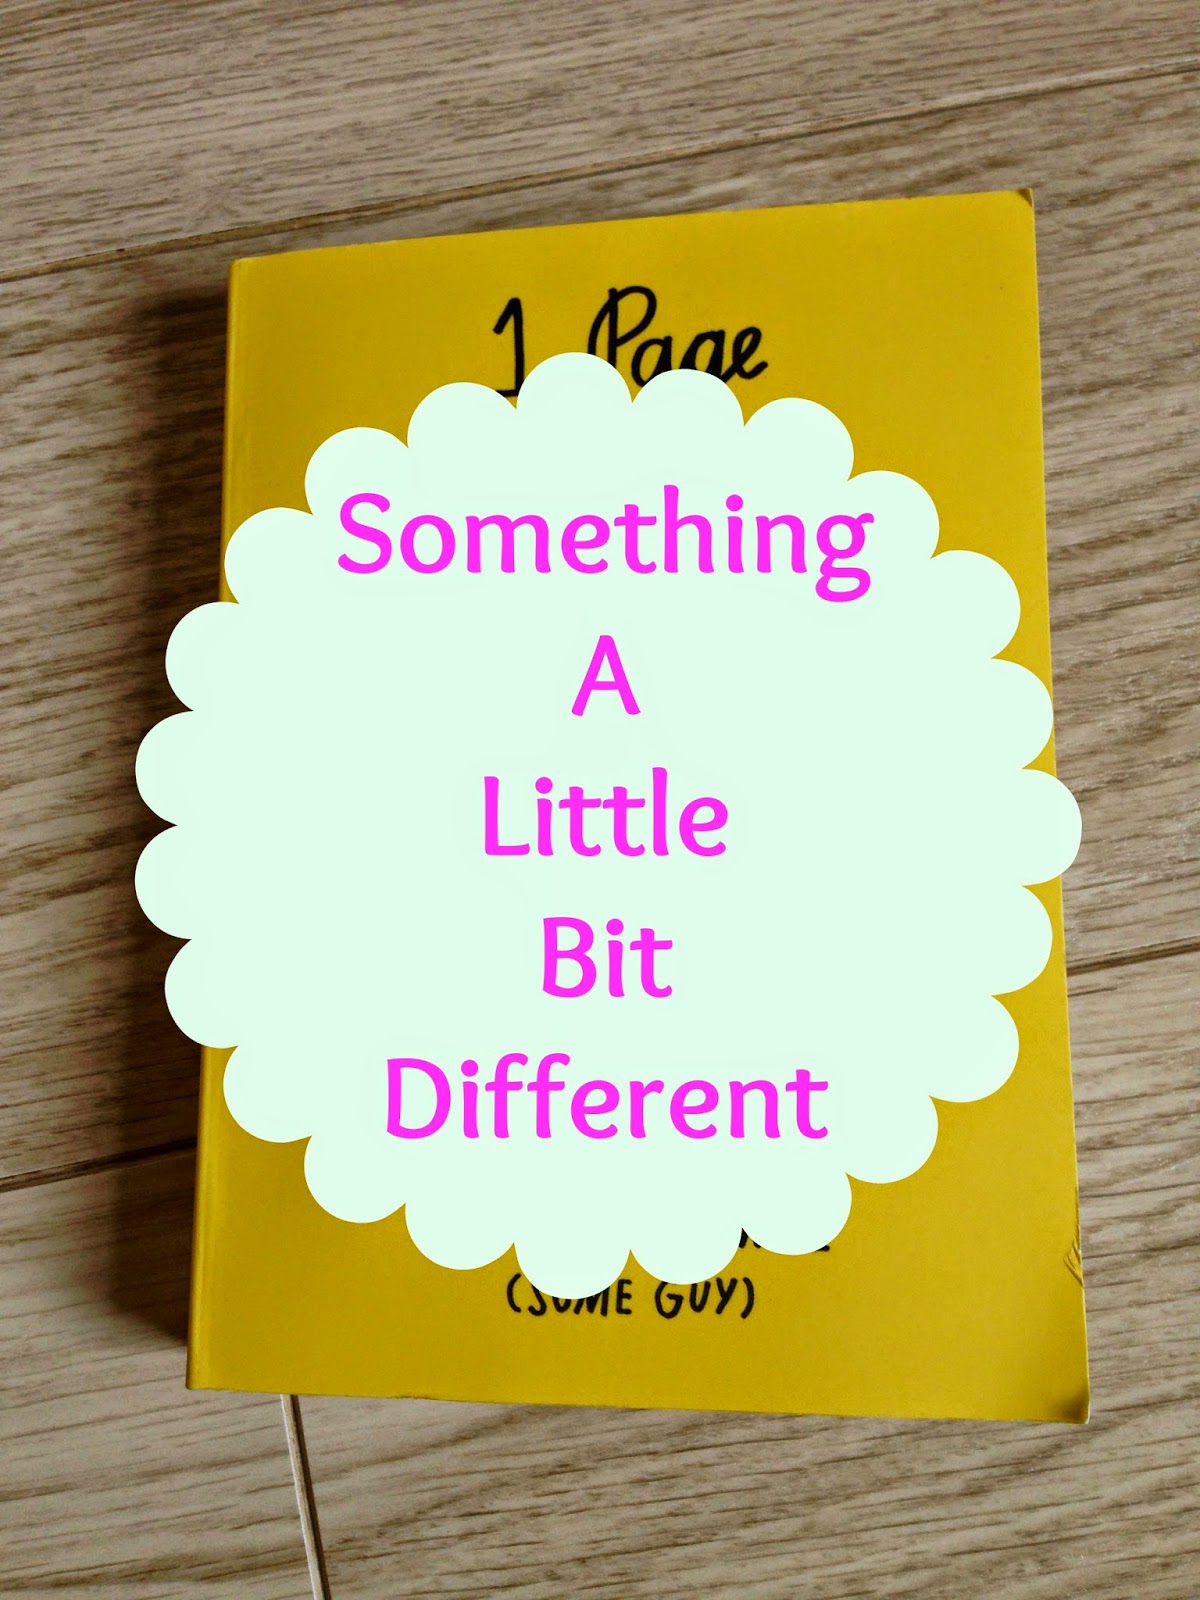
Today's post is something a little bit different, it's a post about a book, I don't think I've ever done a book post before in the 2 years I've been blogging but this book is something I've been really enjoying so I wanted to let you know about it. I did mention the book in my January Random Favourites video (click this link to watch the video) but it definitely deserves it's own post too.

I received the book for Christmas from Nichole and Alicia, having a terminal medical condition means I spend a lot of time indoors and get bored very easily, my lovely girls know this and bought me the book as a bit of a "different" gift for Christmas and I love it! 

So here's the book 


1 Page At A Time by Adam J Kurtz is described as a "creative companion" and I have to agree, it has 365 different things to do, 1 day at a time as the title of the book suggests, so each day I do one of the tasks, you don't have to do them in page order but I do, theres lots of different things to do, from drawing something to writing lists or taking a photo of the page and uploading it to Twitter with a certain hash tag, I like those ones as I love searching the hash tags to see what other people who have the book are doing with theirs. 


The above photograph shows four of the pages, these are just pages I chose at random to show you, it shows how different the tasks are, some are funny, some quite serious, some challenge me and take me out of my comfort zone but all are fun to do and I look forward to doing a different thing every day. 

I love the book, it's one of the most random gifts I've ever received but one of the best too. I think the book would make a great gift for a male or female and for all ages too, I'm the wrong side of 40 but could see someone younger or older than me enjoying the book, it would be a great gift for someone who has a long daily commute maybe, something for them to do on their journey or someone like me who's pretty much housebound and doesn't go out from one week to the next, or even someone who's convalescing from an operation for example, I think the book would be suitable for so many people and would highly recommend it, it would even make a great valentines gift if you haven't bought one yet. 

If you would like to buy the book for someone or just fancy treating yourself, you can find it on amazon here for £7.44 plus £2.80 P&P. 

I hope you've enjoyed todays post, if you'd like more book reviews please let me know in the comments. 

Thank you for reading, much love as always 

Zoe x


SHARE:

Monday 9 February 2015

MAC Lipmixes - A Review


Hello Lovelies, 

I first mentioned MAC lip mixes last year on my You Tube channel during one of my monthly favourites videos, possibly my November favourites? And I was also very lucky to receive more colours for Christmas from my lovely girls and showed them in my what I got for Christmas video and since then I have been asked a lot to feature them in a blog post or video so I thought I'd do a review of them for you.

I love the lip mixes and find it really odd that they don't get much love or any at all on you tube or in the blogging community especially when liquid lipsticks seem to have been everywhere these last few months with a lot of brands launching their take on the liquid lipstick. 

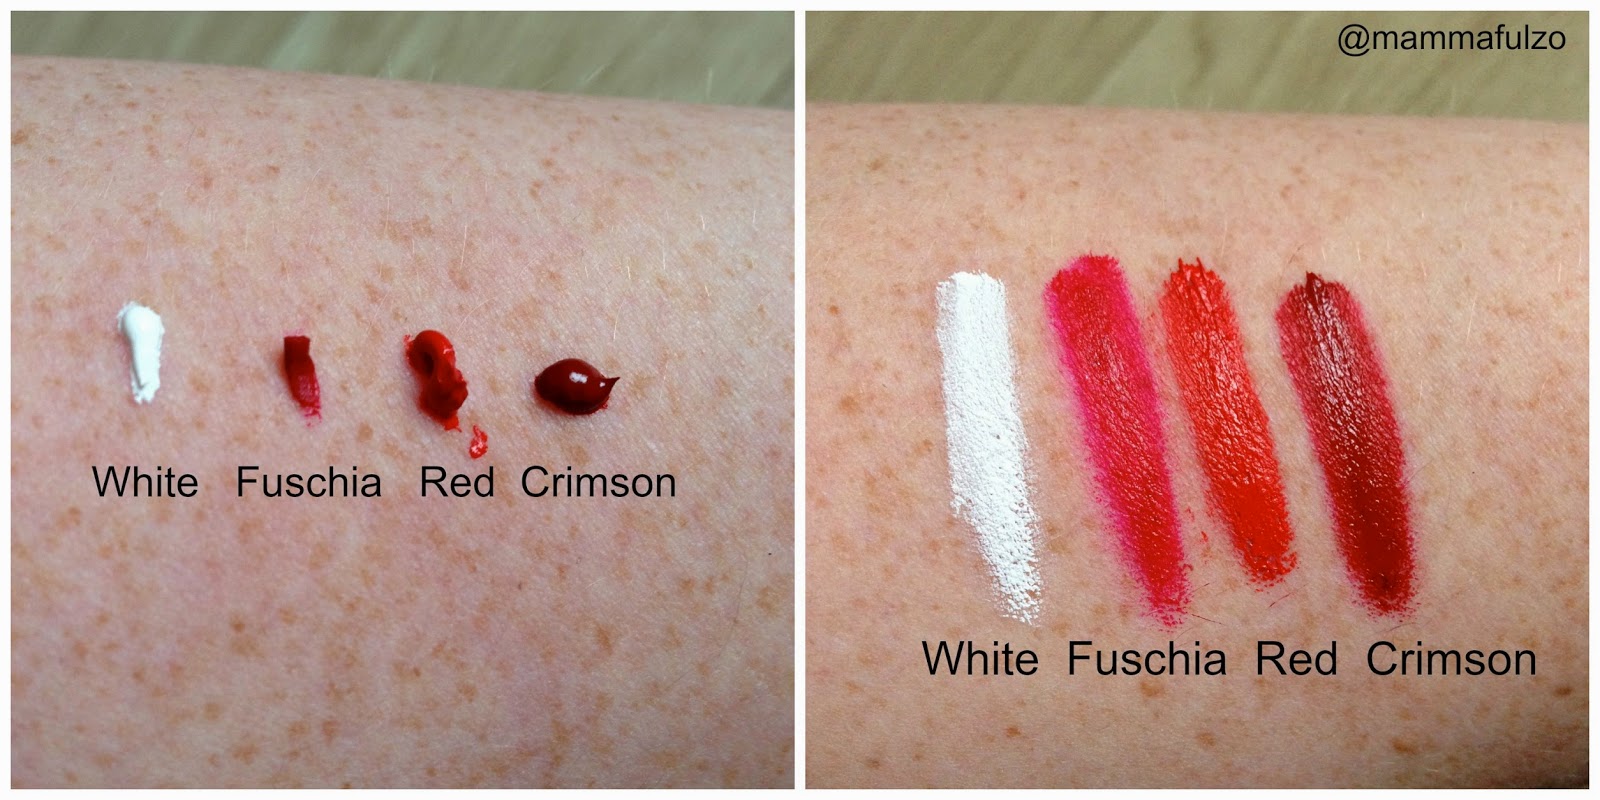
I have 4 shades of the lip mixes, Red, Crimson, Fuchsia and White but they do come in 12 shades and can be mixed to customise your own shades so you could make many different shades from them. I like to mix my white with the other colours I have to make some lovely pink shades and it's nice because the shade you create is a totally bespoke colour that nobody else will have. The red and black shades mixed together make beautiful plum colours too, Nichole has a lot of the shades and mixes them to make the most gorgeous colours. I first fell in love with the lip mixes when Nichole used a red one, the red is a gorgeous vibrant red and unlike any other red I have, Nichole said of course I could use it and I did and it was love, and I knew I wanted to try more of them.

The colours I have and swatches

The Lip mixes I Have

Swatches

As you can probably see from the swatches above, the lip mixes do look slightly different in their packaging, obviously the white and red don't but I think the fuchsia is a little brighter than it looks in the packaging and the crimson too. The amount shown on the left hand side of the photograph in the colours red and crimson would be the amount I use to fill in my lips, you don't need a lot of the product at all, a little goes a long way and although these are an expensive product at £14.50 I think they would last a long time and some of the high street or drug store liquid lipsticks I feel are expensive for example the Bourjois Rouge Edition Velvet lipsticks, they are £8.99 which I feel is expensive for drugstore or high street make up, the lip mixes are £5.50 more expensive but in my opinion, a much better product. 

I have been asked if the lip mixes are similar to the OCC Lip Tars, but having tried both I'd say the MAC lip mixes are 100 times better, I find the lip tars to be a little streaky and hard to apply and they don't last anywhere near as long as the lip mixes, I much prefer the lip mixes and would recommend them over the lip tars any day of the week. I would also say the lip mixes are more than worth the extra £3.00 you pay compared to the lip tars, I won't go into the lip tars in this post as thats a whole other review (if you'd like one) 

What I love about MAC lip mixes

First of all, here's how MAC describe the Lip mixes on their website -

A highly pigmented cream used to mix and customise lipstick to create any colour, texture or look desired for lip colour. Contains soothing emollients to help condition the lips. Available in a wide range of shades in a creme texture. 

I totally agree with their description, the lip mixes are really pigmented and feel creamy to apply they aren't dragging at all even though they do dry down to a matte formula you can still rub your lips together with ease they aren't in any way uncomfortable. They do have a wide shade range, I think 12 shades is a good amount especially given that you can mix the colours and create so many more shades. 

They mix well and can be stored in plastic pots once mixed. I use ones I've been given when I've been given a sample from a cosmetic counter but if you don't have any of those you can buy them from eBay here for £2.50 for 6 pots including delivery. The pots can be washed and re used as many times as you like and you can use them for asking for a sample at a counter too, win win situation I'd say. 

The application of the lip mixes is easy, I use a lip brush to apply mine and would say you will need to apply them with a lip brush as I think using your finger could get very messy. They apply easily and blend out with ease too and as I said they don't drag on the lips at all, they dry to a matte formula and the lasting power is amazing, they last for hours! I haven't experienced any bleeding but if this is something you're concerned about you could use a lip liner, I recently purchased the Rimmel Moisture Renew Lip liner in Transparent, this would be great as it would go with any colour you have or whatever colour you created, but as I said I haven't had any problems at all with bleeding. 

The lip mixes don't feel drying when I wear them, but I don't have dry lips as a rule, I put this down to the fact that when I do my skin care routine I also use all my products on my lips, even my pixi glow tonic, yuk I hear you cry, but I do think this is why I don't have dry lips, but if you do you could maybe add a lip balm before or after you've applied the lip mix. I love the lip mixes and could go on all day about them, but I won't bore you, I will just say again they are good value for money, they apply well, come in a great shade range, they remove easily with a make up remover or cleanser, they last for hours, you can create so many different colours and most of all they look great.

I am always asked what lip product I'm wearing when I wear one of my lip mixes, I have some photographs of me wearing the lip mixes (apart from the white) 

Fuchsia

Red

Crimson

Unfortunately I don't have a photograph of me wearing Crimson, so had to include a thumbnail from one of my videos, which isn't the best quality I'm afraid, but you can still see the colour. I do have a lot of blue in my lips because of some of the medication I take so it can throw colours slightly and the lighting has been appalling recently so these photographs are dark unfortunately,  but hopefully you can see from both the swatches and the photos of me wearing the products how they look. 

The only down side I can think of is that the lip mixes are a pro product so this means you can't pick them up at a MAC counter in a department store, but you can order them on line here so all is not lost,  I have ordered from the MAC website many times and never had a problem at all and the delivery only takes a couple of days. 

I have also been asked for a video showing me mixing the products to create different shades or I could take photographs and write a post showing the same thing, if you would be interested in either of those please let me know in the comments. 

I hope you enjoyed todays post, as I said I have been asked for a review type post a lot so I hope this didn't disappoint, if you have any questions at all please leave them in the comments for me and I will reply asap, I always reply to all my comments and questions. 

Do you have any of the MAC lip mixes? Would you like to try them? 

Thank you for reading, much love as always, 

Zoe x


SHARE:

Tuesday 3 February 2015

Wear It. Beat It


Hello Lovelies, 

Today I have a bit of a different post for you all, some of you may already be aware, some of you may not but my youngest daughter Alicia or Lissy as we call her was born with a heart condition, the heart condition she has is called a VSD or Ventricular Septal Defect, some of you may have heard of this condition as it is more commonly known as a hole in the heart. If you'd like to find out more about VSD see this article

I'm not going to go into detail of Alicia's condition or my experience with diagnosis and treatment etc, that's for another post if you'd like one, this post is to tell you about a fantastic way you can all help to raise money for the British Heart Foundation on Friday 6th February, that's this Friday coming  we don't have much time so I shall tell you how to get involved :-) 

February is heart month but this Friday 6th February the British Heart Foundation (BHF) have a fundraising event called Wear it.Beat it where we can all raise money, or just donate if you'd like to for the BHF, when Alicia was diagnosed with her heart condition the BHF were amazing and really helped me to understand what was going on, my uncle also died of a heart problem and my auntie had a heart condition and died when I was just three, none of this is related to Alicia's condition but as a family the BHF is a charity very close to our hearts if you'll pardon the pun.

I was kindly sent some information from a lovely lady called Lauren at the BHF all about Wear it.Beat it after I'd emailed asking how best I can get involved and let you all know about Wear it.Beat it, so I shall include that information below for you.

I also have some more information at the end of the post showing you some other ways in which you can be involved. 

This is the information Lauren from the BHF sent me - 

Wear It. Beat It. this February for Heart Month and join the nation in the fight against heart and circulatory disease with the British Heart Foundation

Did you know that one in four of our loved ones are lost to heart and circulatory disease each year? It is responsible for almost 160,000 deaths in the UK each year, an average of 440 people each day. There are currently 7 million people in the UK living with heart and circulatory disease.  

On the first Friday of the month, 6 February, the British Heart Foundation (BHF) is asking the nation to join the fight for every heartbeat and show their support by organising a Wear it. Beat it. Event, as a part of Heart Month, to raise funds for life saving research. Whoever you are doing it for, and whatever you decide to wear, it’s easy for your workplace, school or group of friends to take part.

If you want to get involved with Wear It. Beat It. simply encourage your colleagues, friends or pupils to wear red for a day and host a red event. You will find all the tools you need to help you plan a spectacular red fundraiser in your free fundraising kit available from the BHF, including posters, stickers, recipe ideas and red-themed quizzes.

The BHF is the UK’s number one heart charity. For over 50 years it has pioneered research that’s transformed the lives of people living with heart and circulatory disease. It has played a pivotal role in the discoveries of vital treatments helping those affected to live longer, healthier lives. 

This cutting –edge programme of research is powered by your generosity and support. Every pound raised will help make a massive difference to the millions of people living with these conditions.

Help mums, dads, grandparents or babies born with heart and circulatory problems by hosting a Wear It. Beat It. event for the BHF on 6 February.

For more information about Wear it. Beat it. or to donate please visit  bhf.org.uk/red


If you are unable to support a fundraising activity don't worry, you can still be part of Wear it.Beat it. If you have Instagram (here's mine) you can take a photo of yourself wearing red, it can be clothing or you can take a selfie wearing red lipstick and upload it to Instagram and tag the BHF and also use the hashtags #wearitbeatit and #wearitred, their Instagram account is the _bhf (here's a link

You can also text RED to 70060 to donate £3 to the BHF. It's as simple as that, you don't have to hold or attend a fundraising event to join in. If you have Twitter (mine is @mammfulzo) please use the hashtags #wearitred and #wearitbeatit if you upload a tweet or photograph to Twitter, and if you'd like to follow the BHF on Twitter you'll find them at @TheBHF. And by using those hashtags on Twitter and Instagram means you can also see how others are supporting Wear it.Beat It. 

The nursery where Simon teaches are holding a wear it red day so all the staff and children are wearing something red and they are also holding a raffle to raise money for the BHF,  we have donated a lovely heart print make up bag and some strawberry smellies to go inside it as one of the raffle prizes and both Simon and I and both our girls will also be texting RED to 70060 and donating £3 to the BHF as well as wearing red of course, it's a fabulous opportunity to wear red nails and a red lip ;-) 

I'd love it if you could join in with Wear it.Beat it and help to raise money for a fantastic charity whom without it both mine and more importantly Alicia's life would have been much harder, their research and work is invaluable and they deserve so much more recognition than they get, so please get involved if you can, please also feel free to share this post on your blog if you have one and if you don't have a blog please share it via your social media platforms so we can get everyone we know involved in Wear it.Beat it and if you do get involved please let me know, tag me in Instagram photo's or send me links to anything you do to support this great event, I'd love to see how you got involved. 

Thank you so much in advance to those of you who share this post and for those of you who will be getting involved, it means such a lot to me and Simon and of course Alicia. 

Thank you for reading, much love as always

Zoe x


SHARE:
Blogger Template Created by pipdig